
Why Start Composting at Home
Composting at home reduces kitchen and yard waste while producing a nutrient-rich soil amendment. It lowers landfill contribution and improves garden health without expensive fertilizers.
Home composting is accessible to most households. You can use a small bin on a balcony or a larger pile in a backyard.
How to Start Composting at Home: Basic Principles

Compost forms when organic materials break down through microbial activity. To keep this process efficient, you need three things: carbon (browns), nitrogen (greens), and air.
Balance, moisture, and particle size affect speed and smell. Aim for small, mixed pieces and a texture like a damp sponge.
Choosing Where to Start Composting at Home
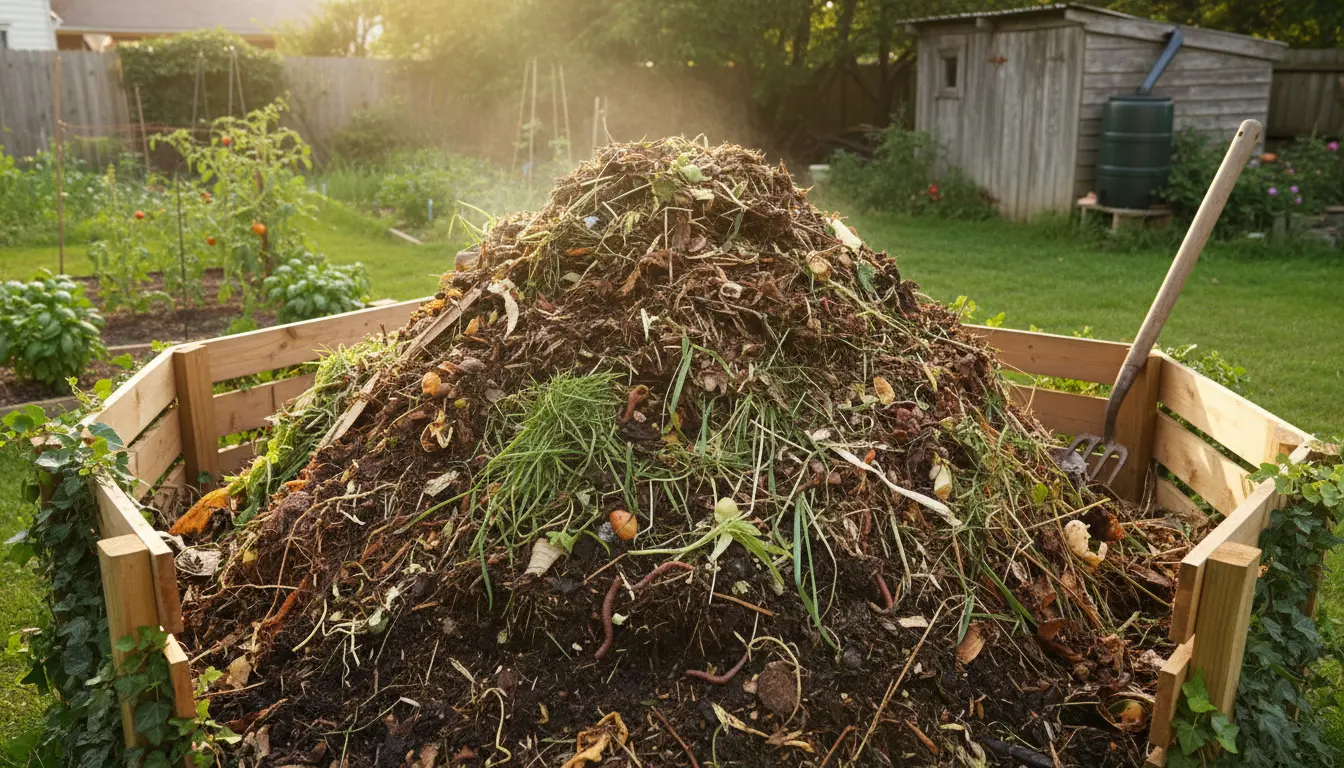
Pick a level spot with good drainage and partial shade. Accessibility matters — place the bin near your kitchen or garden to encourage regular use.

Options include tumblers, stationary bins, worm composters (vermicompost), or open piles. Choose based on space, budget, and how fast you want results.
How to Start Composting at Home: Step-by-Step Setup
Follow these practical steps to begin composting today. Each step is simple and uses common materials.
Step 1 — Select a Bin
Pick a bin size that matches your waste output. Small households can use a 20–40 gallon bin; larger families may need multiple bins or a bigger container.

Tumblers speed up mixing. Open bins are cheapest. Worm bins work well for kitchen scraps and indoor use.
Step 2 — Layer Browns and Greens
Start with a base of coarse browns like twigs for airflow. Then add alternating layers of greens and browns.
- Greens (nitrogen): vegetable scraps, coffee grounds, fresh grass clippings.
- Browns (carbon): dry leaves, shredded cardboard, straw.
A good rule: aim for roughly 3 parts browns to 1 part greens by volume. Adjust if the pile smells or is too dry.
Step 3 — Maintain Moisture and Air
Compost should be as damp as a wrung-out sponge. Add water during dry periods and cover the pile during heavy rain.
Turn the pile every 1–2 weeks to supply oxygen. Tumblers make this easier; for open piles use a pitchfork.
Troubleshooting: Common Problems When You Start Composting at Home
New composters often face odor, pests, or slow breakdown. Each issue has a simple fix.
- Smelly pile: Add more browns and aerate frequently.
- Pests (rats, flies): Bury food scraps deeper, avoid meat and dairy, or use a closed bin.
- Slow composting: Chop materials smaller and maintain moisture and heat by balancing greens and browns.
What NOT to Add
Avoid meat, bones, dairy, diseased plants, and pet waste to reduce pests and pathogens. These items can also create foul odors.
Compost can retain up to 20% of the original volume as usable humus and can reduce household waste sent to landfills by up to 30% for an average family.
Turning Finished Compost Into Garden Gold
Finished compost is dark, crumbly, and smells earthy. Depending on conditions, it can take 2 months to 2 years to finish.
Use finished compost as a top dressing, mix into potting soil, or incorporate into planting beds to improve soil structure and nutrient content.
Simple Uses
- Vegetable beds: mix 1–2 inches of compost into the top 6–8 inches of soil each season.
- Potted plants: mix 20–30% compost into potting mix for better water retention.
- Lawn care: spread a thin layer (1/4 inch) over the lawn in spring to improve soil health.
Small Real-World Example: Community Gardener Case Study
Marisol, a community gardener in Austin, started a 3-bin system behind her community plot. She collected kitchen scraps from three families and mixed them with shredded leaves from local tree trimmers.
Within eight months she had enough compost to top-dress all community beds. Tomato yields increased noticeably, and the group reduced their collective trash by one weekly bag per household.
Tips to Succeed When You Start Composting at Home
- Keep a small counter bin with a lid for kitchen scraps and empty it daily to the outdoor bin.
- Shred or chop material so microbes can break it down faster.
- Record what you add and how often you turn the pile to identify patterns that work best.
Final Checklist to Start Composting at Home
- Select a bin suitable to your space and waste volume.
- Balance greens and browns and maintain moisture.
- Turn regularly and avoid adding meat, dairy, or diseased plants.
- Use finished compost to improve garden soil and reduce fertilizer needs.
Starting composting at home is a practical way to reduce waste and improve your garden over time. With a simple setup and regular maintenance, most households will see benefits in a few months.